Showing posts with label drawing. Show all posts

Saturday, June 21, 2025

The Best Drawing Paper to Use with Drawing Pencils


As I mentioned in this prior article about the different grades of drawing pencils, the paper is an important part of the drawing experience. The way pencils (and other dry media, like charcoal and pastel) work is that when you draw, you leave a trail of the graphite powder that, when compressed, forms the pencil "lead", on the surface of the paper. The various pencil grades indicate exactly how much of the powder you will leave, which determines the quality of the mark you make. 

So, let's talk about that paper surface, which is the other part of the equation. If you've ever tried to draw with a pencil on a piece of slick posterboard, you'll have learned you can't get very artistic with it - the slick surface doesn't have enough tooth (texture) to abrade the graphite particles off of the pencil. It's fine - posterboard is designed for ink, which likes a smooth surface to sit on. For pencil drawings, however, you will want a paper surface with some tooth. How much depends on what hardness of pencil. 

If you are using very soft pencils, use a paper with more texture, like pastel/charcoal paper, which is designed to grab those particles and hold them in their nooks and crannies, allowing you to build up layers of tone. For harder pencils, use a smoother surface, so your pencil won't catch or "skip" on the texture. You'll want to display the sharp, clean line a hard pencil makes on a surface with just enough texture to grab those graphite bits but not enough to dull or smear them. Vellum is a great choice for use with hard leads. 

Just as with any job, having the right tools makes the work a whole lot easier! 

The portrait above was completed with a 2B pencil on Strathmore 400 Series Drawing paper. Strathmore is my favorite brand. It's Scottish, so it's nae crap! 


Other articles about drawing you might like: 

https://allsortsartbyali.blogspot.com/2016/02/learning-to-draw-first-step-have-right.html

http://allsortsartbyali.blogspot.com/2015/03/i-have-been-professional-portrait.html

http://allsortsartbyali.blogspot.com/2015/03/figure-drawing-101-wacky-secrets-of.html

http://allsortsartbyali.blogspot.com/2015/05/figure-drawing-101-so-you-wanna-be.html 


For regular shenanigans, please follow my Facebook page, https://www.facebook.com/allsortsofart 


Wednesday, October 9, 2024

Inktober 2024 Prompt List and Some Updates


I haven't written about Inktober in a while, and it's under way again, so first things first: There is the prompt list, above. Yes, I know they release it in September, and I know it's already the second week of Inktober, but...you know how I am. By the way, if you follow my Facebook page ( https://www.facebook.com/allsortsofart ), you will note that I shared the prompt list when it was released, so this is just kind of, let's say, reinforcement.

The last time I blogged about Inktober was in 2022, when I was writing about Inktober 2021 (again, completely on brand), right here https://allsortsartbyali.blogspot.com/2022/09/inktober-2021-thrilling-conclusion-kind.html . I'd actually had a cracking good year, producing well more of the prompts than usual, owing a lot to the fact that I ended up doing a few drawings later in the month that combined three prompts each.

Inktober 2021, Day 9, “Pressure” - I mentioned this one at the end of the last Inktober article as having been pencilled (believe it or not, prior to the start of Inktober that year) but not inked. Happily, I did manage to finish the inks on it – this year!!!


I wasn't very gung-ho about Inktober 2022 (still tired from the prior year? Anybody's guess), but I did produce work for the first two prompts, “Gargoyle” and “Scurry”, but, uh...not in that order. Really very much not. Not even in the same year, actually. I produced “Scurry”, a cute sketch of a stressed-out businessrodent, running (literally) late for an important meeting. Scurry, cute lil dude! You'll make it!


The Day 1 prompt, “Gargoyle”, was a classic example of my shooting myself in the foot by deciding that I was going to do a portrait (nooooo!) of one of Notre Dame's famous beasties, from photo reference. This is as far as I got that year:


Decent start, but whew, look – I shouldn't try that nonsense on Day 1. So when did I finish? I'll get back to that.

That was it for 2022, but I managed to do even less for 2023. This time I changed things up by mostly ignoring that it was happening at all, until I happened to notice that the Day 19 prompt was “Plump”, and I got inspired to scribble this cute gal:


And that was all of Inktober 2023 for me. I mean, so far, at least. I do have the idea that someday, I will actually go back and complete every single one of the prompts I missed. I mean, I have many months during which it is not actually Inktober, for corn's sake. At least I scored one, which is one more than the Australian women's Olympic breakdancer scored. I didn't even have to fly to Paris on anyone's dime.

Oh yeah – here's my drawing for “Gargoyle”, which I finished THIS YEAR. And upon posting it, I found out it's not even a gargoyle, dang it. It's a grotesque (they're to scare demons away – the gargoyles are downspouts, to drain the water away). So anyway, tune in next time or sometime to find out how I'm doing with this year's prompts. Spoiler: I am participating again, so there's that.


Here are the other Inktober articles, if you would like the full coverage:

https://allsortsartbyali.blogspot.com/2019/12/a-little-backstory-on-inktober.html

https://allsortsartbyali.blogspot.com/2020/10/inktober-2020-is-under-way.html

https://allsortsartbyali.blogspot.com/2020/11/more-fun-with-inktober.html

https://allsortsartbyali.blogspot.com/2021/03/another-shot-of-inktober-so-what-if-its.html

https://allsortsartbyali.blogspot.com/2022/04/inktober-restrospective-2020-part-two.html

https://allsortsartbyali.blogspot.com/2022/08/inktober-2021-starting-off-with-bang.html

https://allsortsartbyali.blogspot.com/2022/09/inktober-2021-did-i-start-unraveling.html


All images are my original art


Saturday, January 6, 2024

What Are the Different Grades of Drawing Pencils, and What Do they Mean?


If you are new to drawing, you may be looking at art supplies and notice that drawing pencils often come in sets that include a range of leads. Usually, these are labeled with H and B along with various numbers. Some brands have other letters, just to make things confusing - for whatever reason, Staedtler uses E. Most lines, however, use the grades you see in the sample chart, above, which can also include F. Don't worry, I will explain what the different grades mean – even the rare ones. 


Basic Info about Drawing Pencil Grades

First things first: a pencil "lead" is a stick of compressed graphite powder, so no worries about being in contact with actual lead. As you draw, you leave a trail of that graphite powder on the surface of the paper. The various pencil grades indicate exactly how much of the powder you will leave, which determines the quality of the mark you make. 

Let's start with the letters: H stands for hard and B stands for soft (yeah, I know – maybe it would help to think of the softness of a baby or a bunny). HB is in the middle, and then you go up the numbers to the hardest and softest leads. The hard leads make a lighter mark that is more precise (because less graphite is being deposited) and the softer leads leave a darker, less-defined line, because more of the soft graphite particles are being shed onto the paper surface. The higher the number, the more of this characteristic there is: an 8B is loads darker and smeary that a 2B, and as expected, an 8H is harder and more precise than a 2H (you may notice that there's no 1H or 1B – those are just H and B). 

As for the one-offs, F stands for either Firm or Fine (as we've learned, a firm lead makes a fine line, so they are essentially interchangeable). As you can see from the above chart, F is in the middle with HB, but is put on the H side. E, in the Staedtler lines, stands for Extra Black (they will sometimes use EE or EB, as well), so it would occupy the spaces after the highest B numbers. 

Fun fact: the "number 2" pencils commonly used in schools are a 2B lead. The reason they are so common is that they are required for the standardized tests we took as kids where you have to darken in an oval for the correct answer. The 2B lead is dark enough to be easily read by the optical scanner that grades the tests, but firm enough so that it doesn't smear into other circles.


Tips about Using Different Drawing Pencil Grades

Be aware that the harder the lead, the more it tends to press into the paper. If you are trying to make a fine art drawing, you will be sad, because these teeny little furrows will mess up your flow. If you are making a technical drawing, however, you will be fine, because you will probably be using a hard surface - perhaps vellum - on which to draw, and you will be ruling precise lines that probably won't need to be shaded over or erased. 

Soft leads have their own challenges. The softer the lead, the more it tends to smear – great for blending and building up dark tones; bad for maintaining the cleanliness of you, your clothing, the work surface, etc. Be warned. 

A word of warning about these pencil sets: You might be tempted to mix the different leads in the same drawing, since you have a bunch. Yeah, don't do that. The hard leads have a noticeably "silver" cast, down to a much darker, charcoal-like black for the softest leads. They DON'T look good together. Don't go more than two grades away (say 4/5/6B, for example) if you want your tone to be consistent. Anyway, your really don't need all these different grades, in my opinion: If you want a lighter line, don't press down as much. For a darker line, press harder, thus depositing more graphite. That's how I get the full tonal range with just one grade of pencil. I personally use a regular old #2 mechanical pencil (Papermate Sharpwriter, if you're curious), and I can get a decent tonal range out of it (see my drawing of Tom Cruise below).


Enjoy your journey into the wonderful world of drawing! Drawing is a wonderful baseline skill to develop that will in turn improve your skills as a painter, a printmaker, and a designer or illustrator. I hope my tutorial helped. 


For regular shenanigans, please follow my Facebook page, https://www.facebook.com/allsortsofart 


Other articles about drawing you might like: 

https://allsortsartbyali.blogspot.com/2016/02/learning-to-draw-first-step-have-right.html

http://allsortsartbyali.blogspot.com/2015/03/i-have-been-professional-portrait.html

http://allsortsartbyali.blogspot.com/2015/03/figure-drawing-101-wacky-secrets-of.html

http://allsortsartbyali.blogspot.com/2015/05/figure-drawing-101-so-you-wanna-be.html 


Image credits: pencil grading chart - https://upload.wikimedia.org/wikipedia/commons/f/fa/PencilGradingChart.png

portrait of Tom Cruise – my original art, see copyright notice 

Saturday, November 25, 2017

How to Create an Interesting Still Life


Whether you are just learning to draw or paint or have many years of experience under your belt, a still life is an excellent way to practice your rendering skills. Unlike working on location or from a live model, you can control the weather, keep the lighting consistent, and your subject is unlikely to fidget, want to chat, or need a potty break. But do be aware that for an interesting picture, you must have an interesting still life; you can’t just throw things on a table and call it good. Here are some suggestions to make your still life setup creative, interesting and well-balanced.

Variation. This is the main watchword for still lives; variety is the spice of life, and a still life needs spice, too! Give the viewer some different things to look at by varying the sizes, shapes, textures and colors of your setup. Imagine how a brilliant, velvety red rose would look against a fuzzy white shawl, with a shiny black glazed pitcher in the background! Make sure you use contrast to your advantage—don’t make everything light, or dark, or soft, or shiny. Mix it up and your picture will be much more lively!

Elevation. Also when setting up your still life subject, try to vary the elevations, as well—either use taller things to contrast with shorter, or use props to create different levels. For example, you could place boxes of different sizes under a drape and arrange items on the differing levels created, or you could stack smaller things on books of varying sizes.

Focal Point. While you do want a variety of objects in your picture, you should give the viewer something to home in on so that your picture draws attention in the first place. You will want to have one main subject to act as the star of the show, and once the viewer is drawn by this, the supporting players will be there to add variety and interest. The best results are usually obtained by selecting one really fascinating piece, such as a gorgeous cut-glass vase or a brightly-colored kite, then choosing a few other items that provide contrast in color, size and texture. In this picture by French painter Anne Vallayer-Coster, the ham is clearly the star of the show, but there are a lot of supporting players that add a variety of textures, colors and shapes to create interest. 


Themes. Most people think of a vase of flowers or a bowl of fruit when they think of a still life subject (or both, as seen in the picture at top, by Flemish artist Clara Peeters). These are fine, but you should also try to come up with more creative setups. Pick a theme for your still life, and then try to come up with all the things that could fit the theme. You might choose music as a theme, and you could feature a beautiful old violin as your main subject and then add in the bow, some sheet music, a metronome, a pair of opera glasses and some white gloves. You could pick food as the theme, but instead of the typical bowl of fruit, you could use vegetables instead, or even candy displayed in different dishes and scattered across a cloth. As a student, I drew a still life of the “heavy metal” theme, composed of spiked and studded leather cuffs and belts from my own rockin’ wardrobe!

Personalization. Did you know that you can actually make a portrait out of a still life setup? Instead of making a direct likeness of your sitter, use meaningful objects from their life, such as mementos, awards, and any items that reflect their personal interests or hobbies. If your client is a baseball enthusiast, for example, you could make a still life from their own collection: maybe an autographed ball or glove, a pennant from a favorite team, a pair of tickets and a game schedule, even a box of Wheaties with their hero on the front. Or instead of a theme, use many different items to represent all of their interests, like posters of favorite movies, favorite books, musical instruments, travel souvenirs and so forth. Use your imagination and get creative! This is a great way to make a special, personalized picture for someone who is shy or uncomfortable with the idea of having their portrait made.

Now that you know that still lives can be so much more than just a bunch of flowers or a bowl of fruit, go find yourself some cool African sculpture, antique beer steins or carved wooden toys and set up something that will really make an interesting picture. After all, if it ain’t creative, it ain’t art!


See my breakdown of a Vincent vanGogh's still life, here:  http://allsortsartbyali.blogspot.com/2014/11/van-goghs-stillleben-mit-gelbem.html

Make sure your still life has a strong focal point! These tips will help: http://allsortsartbyali.blogspot.com/2015/05/painting-composition-101-creating.html

At top:  Still life painting by Flemish painter Clara Peeters, from Wikimedia Commons
https://commons.wikimedia.org/wiki/File:Clara_Peeters_-_basket_of_fruit_with_a_tazza_holding_grapes_a_bouquet_of_flowers_and_a_flagon_WA1940.2.61.jpg

Still life with ham by French painter Anne Vallayer-Coster, from Wikimedia Commons
https://commons.wikimedia.org/wiki/File:Still_Life_with_a_Ham.jpg

For regular shenanigans, please follow my Facebook page, https://www.facebook.com/allsortsofart

Thursday, June 1, 2017

From the Sketchbook - "Eroche"


This drawing was a concept sketch for a painting entitled "Eroche" (pronounced arrow-key). The name doesn't really refer to anything; it just came to me from nowhere and I liked the sound of it (seems vaguely Greek, like Eros). Since it was just a sketch and not a finished piece of art, ball-point pen was the weapon of choice, although to be honest, I actually have produced finished art in ballpoint (mea culpa).

The composition in this sketch seems to be for a montage, but I really was just adding individual studies for the hands and face. I didn't envision more than just the single figure in the picture, but since her hands didn't make it onto the page in the larger version, I wanted to work them out in detail. The position of the hands is about right, but I have no idea why I made the fingernails so long, and I would definitely change that in the final piece, should I ever get around to producing it.

This was drawn from an artistic "vision" that I had--not a mystical type of vision, just a creative picture in my head that was pretty fully realized, of a dancer in an arabesque posture, amid a swirling of fallen leaves. Her skirt has a fluttering hem that mirrors the edges of the leaves.

Where did the flying leaves come from? I was actually inspired by this video for the song "Whisper To A Scream (Birds Fly)" by the 80s band Icicle Works https://www.youtube.com/watch?v=NVQCpI4GbKQ . That video is predominantly brown in tone. I would like to make the painting monochromatic, as well, but I think it has more of a blue feel to it. I do love the imagery and movement of the flying leaves, but I wouldn't use as many as they did in the video--the torrent of leaves seems very chaotic, and I am trying to achieve more of a lilting feel.

Image is of my own artwork. All rights reserved.

For regular shenanigans, please follow my Facebook page, https://www.facebook.com/allsortsofart

Tuesday, November 15, 2016

Image of Thanksgiving: Thanksgiving Dream


Here is my pen and ink drawing for the month of November from the calendar that I designed for the Blood Donor Center at Thomas Jefferson University Hospital in Philadelphia, Pennsylvania. I composed a little poem to go with it:

Twas the Night before Turkey, and deep in his sleep
Came a dream about all of the food he would eat
Turkey with stuffing, and all those good things
He's drooling before the alarm even rings!

Image is my original artwork. Click to enlarge!

For regular shenanigans, please follow my Facebook page, https://www.facebook.com/allsortsofart

Sunday, August 16, 2015

September is Coming Soon! Original Pen and Ink Illustration


I drew the above illustration for a calendar printed for Thomas Jefferson University Hospital to give to blood donors. I did the entire calendar, from cover to cover, and I will be featuring different illustrations from it. The Director of the Blood Donor Center told me that it was one of their most popular incentives and that the entire print run of 500 was completely given away during that month! They saved a copy and put it in the hospital archives, and I was stunned and delighted by the honor.

This page is for September, and I tried to capture the spirit of the month by illustrating the traditions of back-to-school (with the books and the paper lunch bag on the right) and also the start of football season, both in schools and on the professional field. I drew this with crowquill pen and ink on smooth-surface bristol board. I hope you enjoy it!

Image my original work. Click to enlarge for detail!

More of my original art:http://www.allsortsartbyali.blogspot.com/2014/12/a-portrait-of-cheetah-wonder-womans.html

For regular shenanigans, please follow my Facebook page, https://www.facebook.com/allsortsofart

Saturday, March 21, 2015

Figure Drawing 101: Is the Human Figure Really Harder to Draw?


I have been a professional portrait artist for over 20 years (click here for samples of portraits and other artwork), and I have been teaching art, including portraiture, for a while, too. Most of my incoming students echo a belief that I have heard stated many times over the years: "People are the hardest thing to draw."

Well, yes and no. I personally think trees are awfully hard to draw, what with all those parts sticking out every which way, but if your tree rendering is not spot-on, people might not even notice, whereas they will instinctively know that something is not quite right with a problematic rendering of a person, since we are so intimately acquainted with, well, ourselves. Portraits are even more challenging, as they not only have to look like a convincing human being, but like the specific person you are drawing.

On the other hand, we do have that head start of being so acquainted with the human figure. We see it in the mirror, and we see it around us in all its various shapes and sizes. Part of the drawing process is getting to know your subject, and with figure drawing, it's a subject we understand, as compared with, say, technical drawing. Which would you rather draw, a girl in a pink dress, or an exploded view of a toaster? Frankly, I consider anything I have to use a ruler for a challenge.

And yet, it is this seeming familiarity with the subject that can be our undoing: We may be so sure that we know what a person looks like that we have a kind of "person template" in our heads. For those of us who haven't had much training or experience, this might be a very stylized or simplified version of a person: round head, block torso, two rectangle arms, two longer rectangle legs, some sort of attempt at hands and feet. Even people who are trained artists may stick to some form of stylization. Think of ancient Egyptian art: With very few exceptions, Egyptian art followed strict rules when it came to representing people. Paintings and reliefs always showed the human figure with the head in profile, although the eyes appeared as they would from the front. Shoulders and chests faced front, but hips and legs were turned to the side. Try standing that way. Okay, now try walking that way. Uh-huh, I thought so. It's not as easy as the song makes it sound.

But that was thousands of years ago, you say. Yup. Now look at the manga (that's Japanese comic book art) and anime (same thing, animated) style of today. You have to draw everything just so, right? There are plenty of books that will teach you the rules of the style: Those large, swimming eyes; tiny mouths; nearly nonexistent noses; standard bodies. You can tell the characters apart by hairstyles and clothing, but not much else, and it's often hard even to tell gender if you don't already know the characters. And as with the ancient Egyptians, it's hard to distinguish one artist from another by their work.

If you are trying to render the human figure in a realistic style, you will have to overcome your preconception of what a person is supposed to look like. Look at drawings of people that you have done from your imagination. Do they all look like they could be the same person? I'm betting the person looks a lot like you, or at the very least is the same race and gender; maybe the same age. To counteract this, you need to stretch your boundaries: draw people of other races and ethnic backgrounds, different ages and genders. You don't have to hunt down all of these folks on some kind of weird human scavenger hunt and make them pose for you; just get some magazines that have a lot of good pictures of people (National Geographic springs immediately to mind; photography magazines will have some nice shots, as well). Draw from these photos or from live models if you can; the most important part is to use reference, not your imagination.

If you give yourself a wide assortment of people to draw, you will start to become more familiar with racial and ethnic traits, the difference in the facial and body proportions of children at different ages, and the effect of gravity on the features of the elderly. It's fascinating to see the immense range of possible faces nature makes from just two eyes, a nose and mouth, especially when you factor in differing bone structure and face shape.

So, does that mean that people are harder to draw? Actually, I would say no. We have those mental templates of everything-from cats to bicycles to hot air balloons-and we have to get past them. You might think you could draw any of those things on demand, but once you start your picture, you may find there are many questions you can't answer-do a cat's front legs bend forward or backward? Do they have whiskers anywhere other than just on their muzzles? What do the gears on a bicycle really look like? Are the spokes set in any particular pattern? What does the ballast on a hot air balloon look like?

If you get a good, clear reference photo, or if you can get an actual object or person to draw from life ("from life" just means that the thing is there in front of you, whether it's animate or inanimate, hence "still life"), you are forced to observe these details in order to include them in your drawing. To render them accurately, you must note the actual shape, size and color (or tone, if working in black and white) of various components or parts of your subject, and also the shapes, sizes and colors/tones of various components relative to one another. Don't go with what you think a bowl of oranges looks like: draw what you see; you may be surprised at all the variation from orange to orange, as well as within the bowl, the tablecloth, and whatever else you have in the setup.

You have to use this same method of analysis on a human sitter as well as on a bowl of fruit, so technically, it's really just as easy to draw people as to draw anything else accurately. Feel better now?

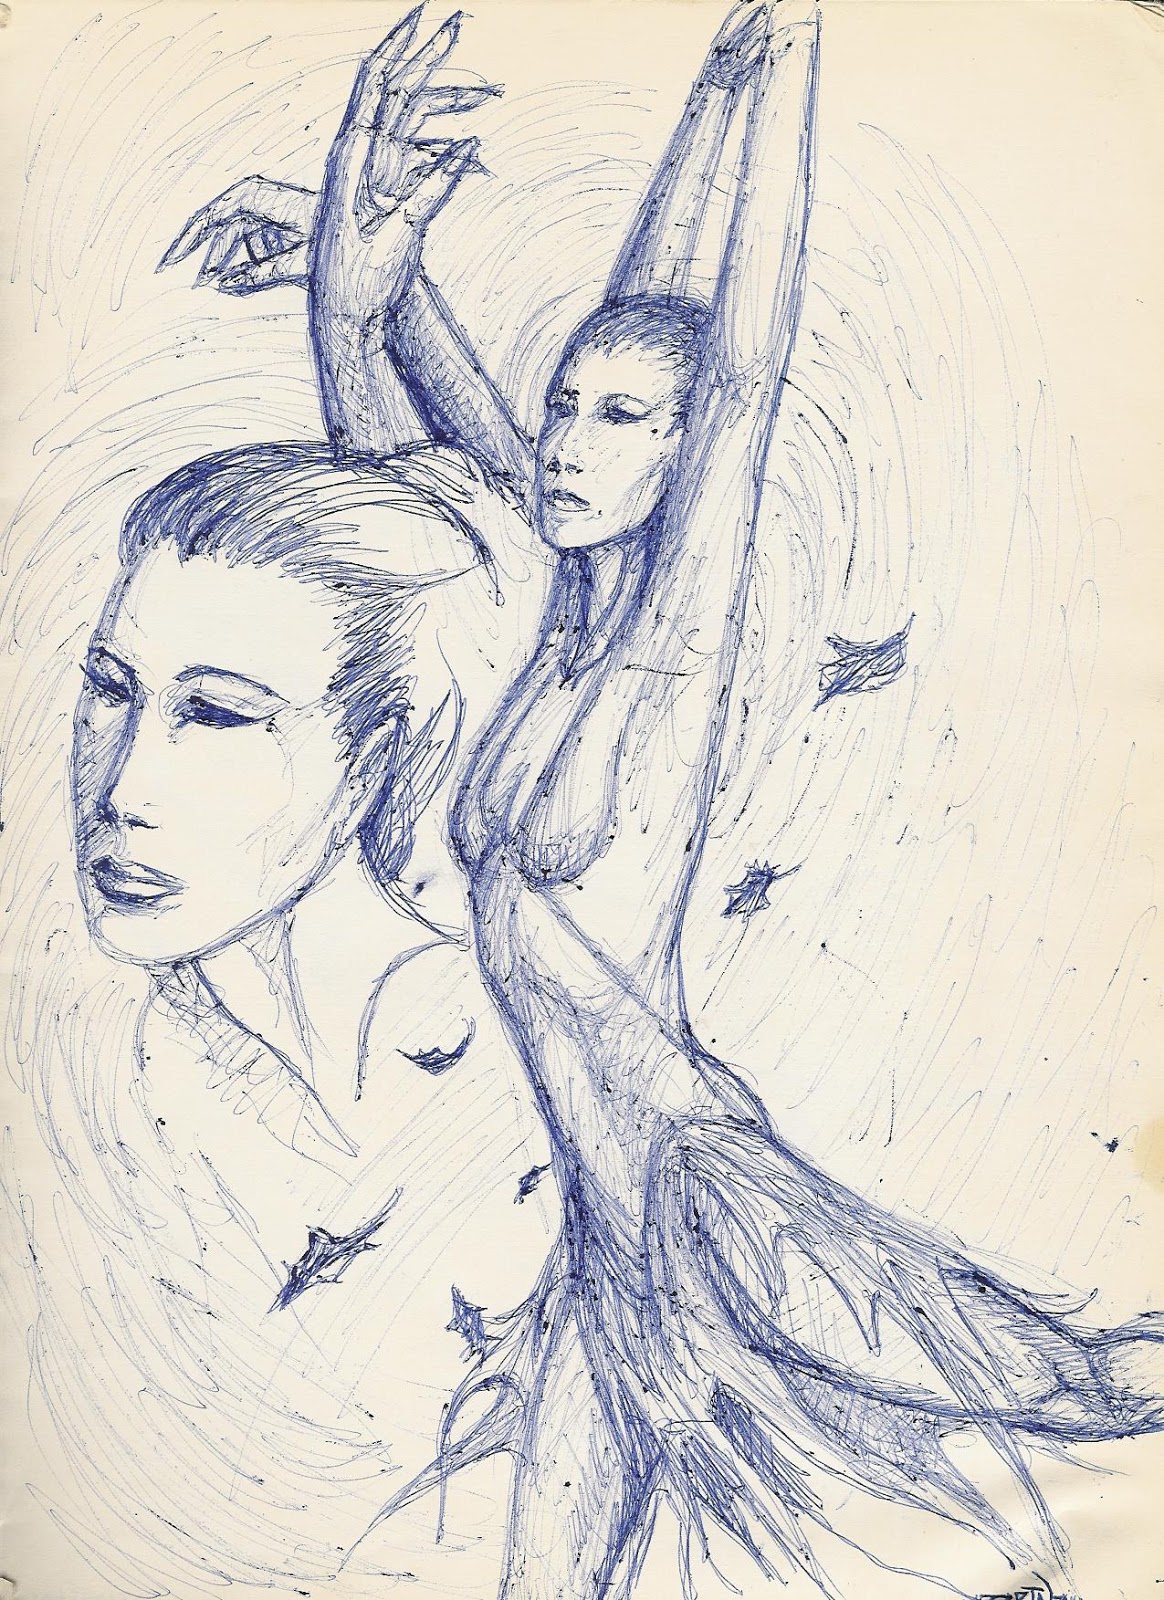
My original work "In the Flow", charcoal on pastel paper

Here is another article you may enjoy about figure drawing:  http://allsortsartbyali.blogspot.com/2015/03/figure-drawing-101-wacky-secrets-of.html

For regular shenanigans, please follow my Facebook page, https://www.facebook.com/allsortsofart

Saturday, December 20, 2014

Misadventure at the Cathedral of Saints Peter and Paul: How I Offended a Nun


Philadelphia is an historic American city, full of wonderful old, majestic places. One of these places is the Cathedral of Saints Peter and Paul, a Renaissance-style Catholic church that dates back to 1864 (pictured above). It happens to be located very near Moore College of Art and Design, where I attended school. One sunny spring day, one of my professors took our drawing class over to the cathedral, from whom we had received permission to spend the afternoon drawing the lovely architecture.

Packing our large pads of newsprint, drawing boards, charcoal and other drawing supplies, we trotted the block and a half or so to the cathedral and entered. Not being Catholic or a tourist, I had not visited the cathedral before, and I was impressed by the size and beauty of the church. Its dark, cool and quiet interior was a sharp contrast to the bright day and omnipresent traffic noise of downtown Philadelphia.

My classmates and I wandered around, looking at arches and columns and various other bits of adornment, trying to determine which design element "sang" to us enough to stake out a spot and start drawing. Everyone else stayed within the main body of the church, but I considered myself a maverick and didn't want to run with the crowd, so I wandered farther afield, finding a smaller chapel to the side.

The chapel was much simpler in style, but a row of windows along a side wall made it sunny and cheerful, and there was a lovely arrangement of white lilies up at the altar. Feeling more comfortable in this serene place than in the dark, cavernous main church, I settled happily into a pew and began sketching. Every now and then, someone would enter the chapel, genuflecting at the doorway, and take a seat farther back in the pews. Most of these people gave me an interested glance when they saw what I was doing, but no one approached me, and I figured they didn't want to disturb my work. I expected they'd come to pray or to say some silent rosaries, which I thought was very devout of them, and I certainly would not want them to be interrupted, either, so I worked as quietly as I could.

Quite a few folks had entered by the time I was about halfway through my three-hour drawing; not nearly enough to actually fill the chapel, of course, but I was really impressed with how many people came in on a random afternoon to spend some time in quiet prayer. A nun entered, genuflected, and sat down in the pew in front of me, giving me a sour look. Did she think I was desecrating the place by making a drawing there? I wondered. She couldn't think that, could she? There's such a long tradition of reverential religious art, I couldn't understand how anyone could take offense.

Right about now, some of you are feeling that I am frightfully dim. First of all, I will stipulate to that, but by way of explanation, let me state a couple of things: I was 18 years old and had never been in a Catholic church in my life. I was raised Presbyterian, and in our church, if nobody was getting married, buried, or baptized, you only went to church on Sunday morning, unless you worked there. 

I was also laboring under the impression that Catholic people are quite likely to enter a church at any given time to sit in a pew and say their devotions, such impression having been given to me by every movie and TV show I've ever seen that features a scene set in such a place. There always manages to be a few devout extras sprinkled throughout any given house of God, praying quietly in the background while the main characters go to confession, question a priest about a murdered nun, or some such, so please, people, allow me my naiveté; I come by it honestly, I swear.

It was not until a priest entered, smiled at me, and then another priest entered and smiled at me that I began to have a clue that MASS WAS ABOUT TO START. The clue was that they entered behind the railing, at the altar! And sure enough, the mass started, and there I sat, drawing board propped on the back of the pew in front of me; rather good rendering, if I do say it myself, of lilies at the altar taking shape on my paper; and an angry nun who turned full around in her pew and hissed, "This is a mass!"

Yes. Yes, it was. I continued drawing, because, pissed nun aside, I knew that what I was doing was not wrong or disrespectful because I meant no harm or disrespect, and furthermore, that those priests had smiled at me. I also was quite sure that getting up and walking out of a religious service was howlingly inappropriate, rude, and possibly even blasphemous, so I stayed put and drew the best, most reverential drawing I possibly could. In time, the mass ended, the huffy nun cast one more baleful glare in my direction and flounced from the chapel, and several people came over to look at my work. No one seemed put out except that nun, who might have mentioned that a mass was coming in enough time for me to decamp, by the way. Poorly played, Sister Prevacid! Even the cheerful priests enjoyed my lily-and-altar drawing, so all's well that ends well.

And that is how I attended my very first Catholic mass, in the venerable Cathedral of Saints Peter and Paul in historic Philadelphia, PA. I'm still frightfully dim, by the way.

For regular shenanigans, please follow my Facebook page, https://www.facebook.com/allsortsofart


Image is my own photograph of the cathedral